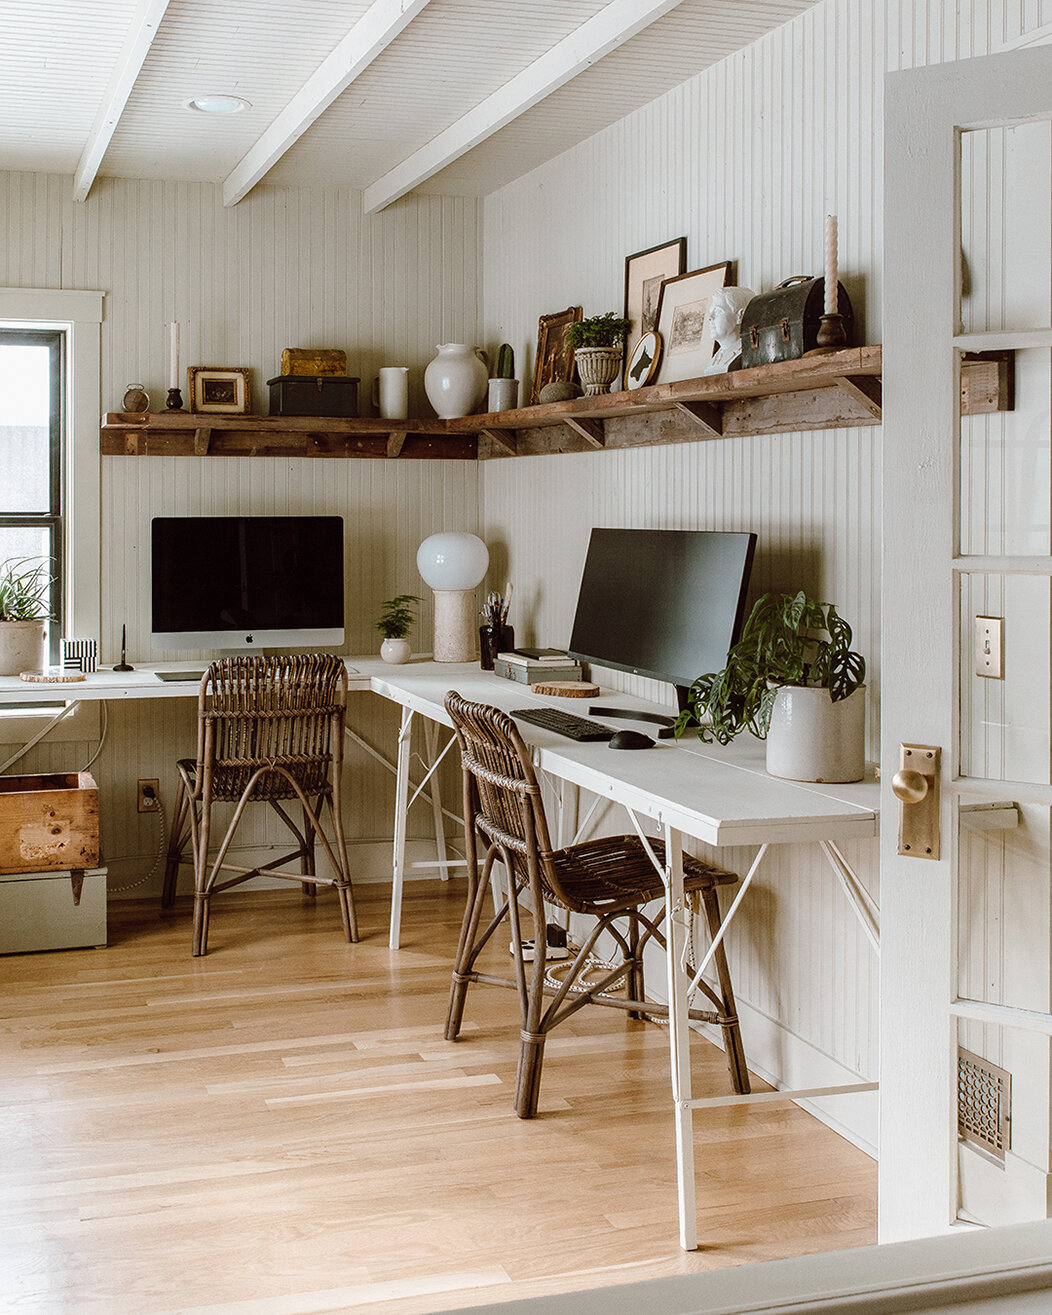
I spent a lot of time thinking about how we were going to organize the cords in the office. Shawn and I both wanted everything to look super clean since we were doubling the amount of electronics in the space. When we first started the project Shawn had 3 more cords than I did and by the end he only had one more! I asked myself a few things while planning and I realized this process was super beneficial so I wanted to share it with you!
HOW CAN I ELIMINATE THE AMOUNT OF CORDS WE HAVE?

This one was pretty easy for me to resolve because Shawn had two monitors, a keyboard and a mouse that all had cords. First, we got Shawn a wireless mouse and keyboard. Half of the problem was solved haha. We’ve been talking about getting a new monitor for Shawn over the last 6 months or so since he’s been working from home and will be for the foreseeable future. We decided on a wide monitor that was just about the same width as his two old monitors. Best decision we made because I personally think it looks really good even though it’s pretty wide and Shawn loves it! My tablet, mouse (I only need it when I restart my comp) and keyboard are all wireless so I didn’t have to do anything on my side of the office. 🙂
HOW CAN I MAKE THE CORDS LOOK …PRETTY?
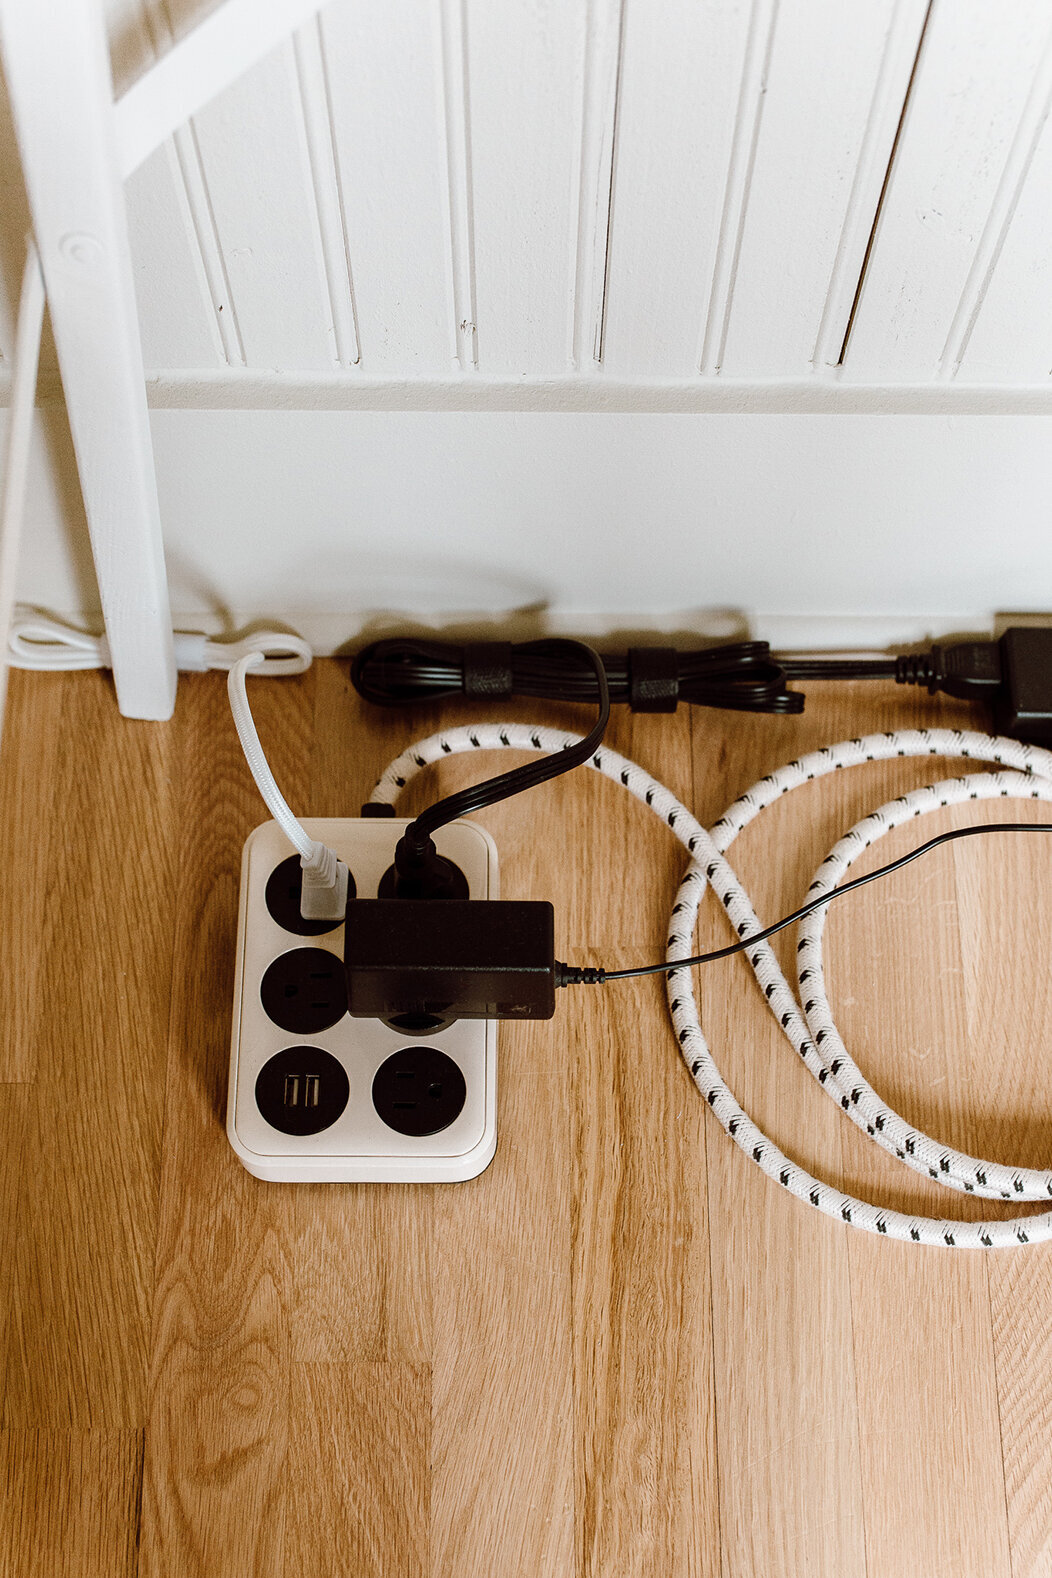
Seriously, ‘pretty’ sounds a little odd but that was what put me on the hunt to find a beautiful power strip…and it worked! I found the most gorgeous power strips and while they were a bit of an investment (similar look but lower price point here and here) they totally turned the cord situation into a pretty detail!
I also used velcro to clean up the longer cords which is such a simple and easy solution! I bought white velcro for the lighter cords and black velcro for the black cords!
HOW CAN I DISGUISE (OR HIDE) CORDS?

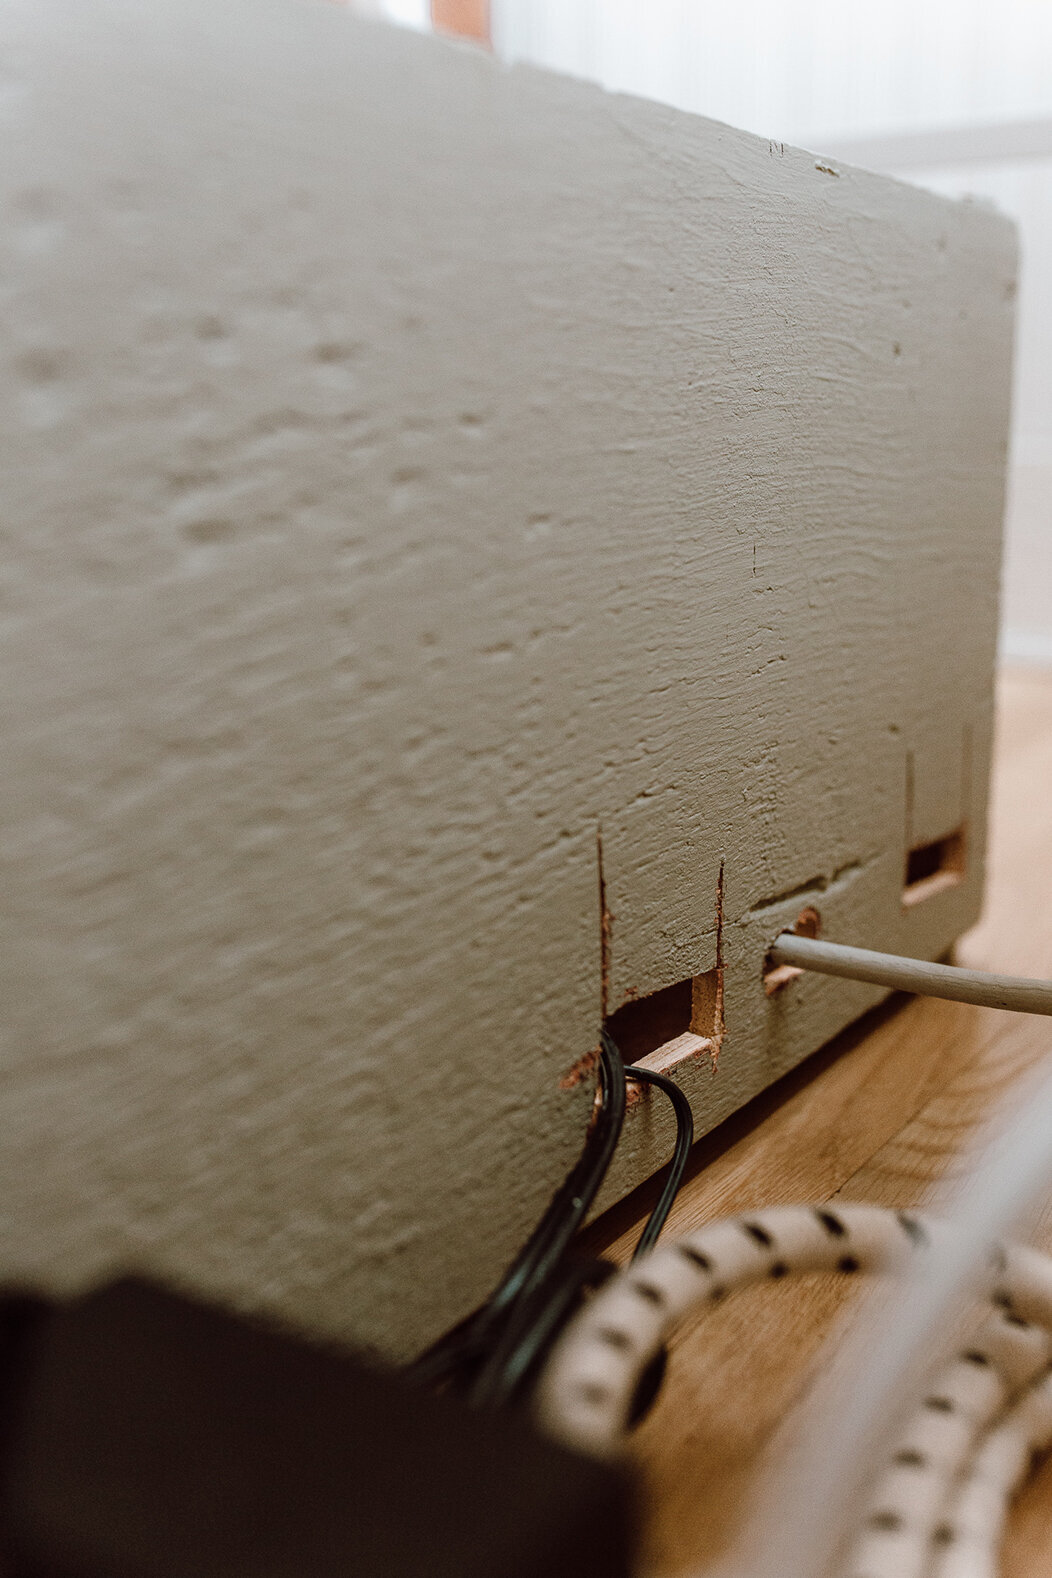
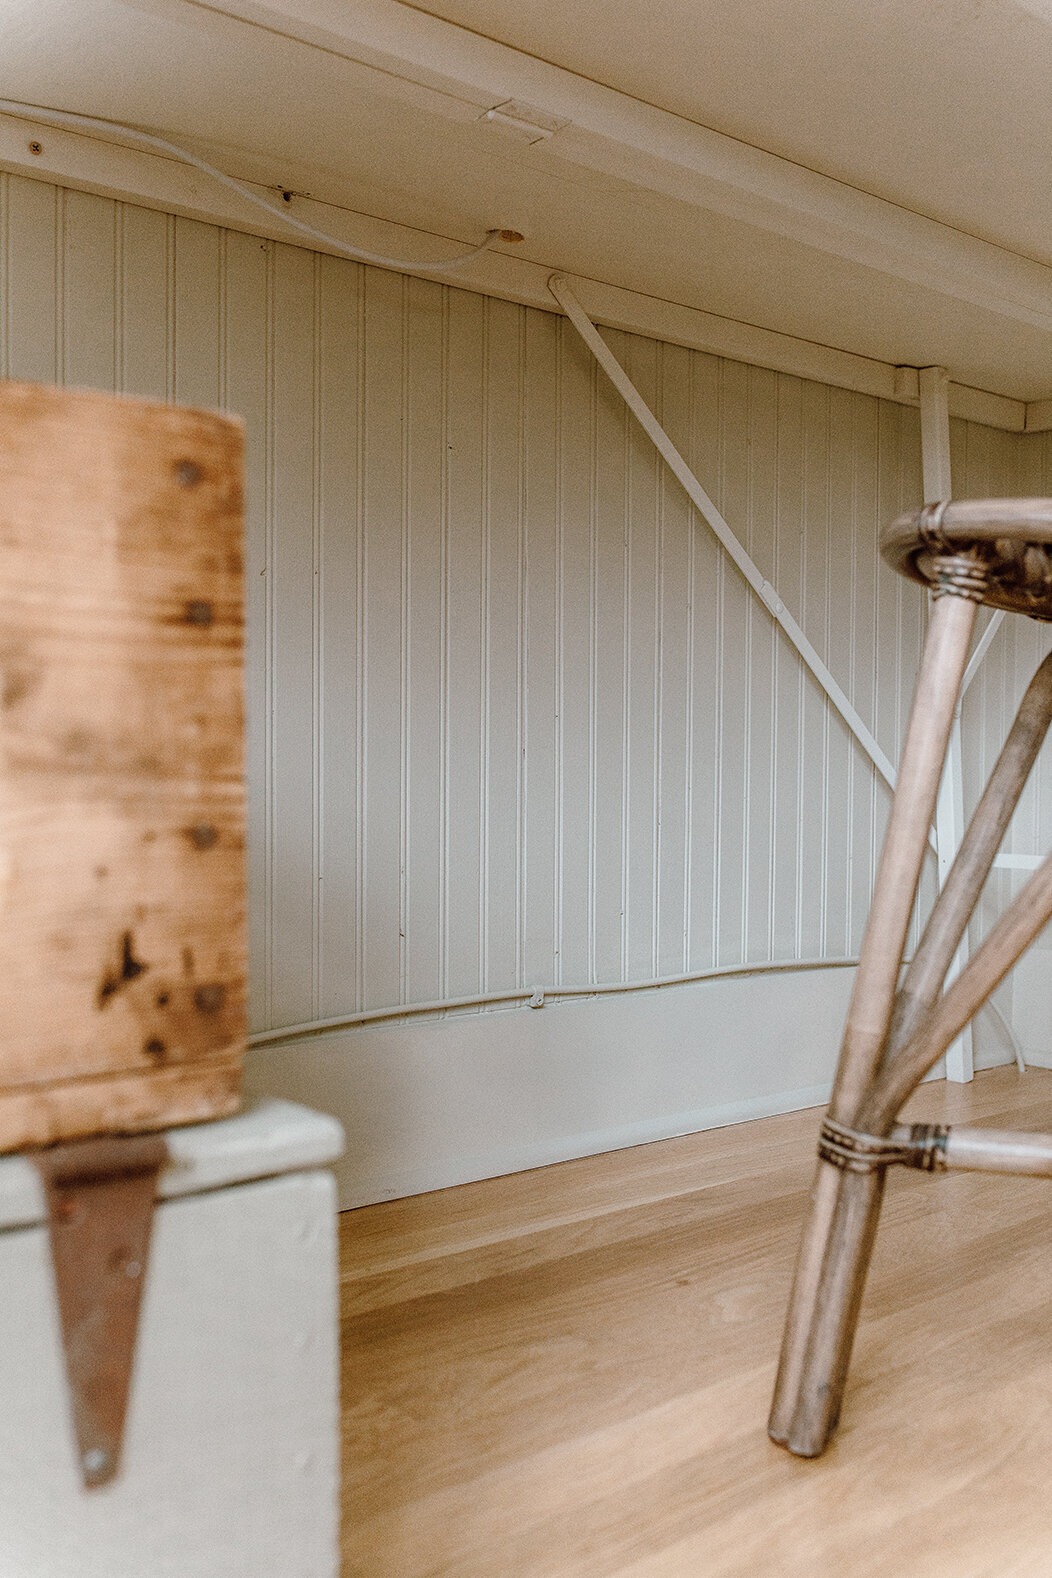
Our modem and router are both under my desk which means the cord for the internet was under it too. Now THAT is a lot of cords to clean up haha. I went back and forth with putting everything in a box on top of the desk so that the internet cord would run straight up the corner of the desk. I tried that out and it was visually too much. I decided to put the modem and router in a box and the cords right outside of the box. I used my oscillating tool to make little cut outs for the power cords and the internet cable, yes, I still need to do touch ups LOL (you’ll see once you scroll down). While I was working on the box I had the idea to paint the cable cord but I wasn’t sure if I could, Shawn looked it up and told me it was okay to paint! Then he gave me the idea to use a little cable mount to keep the cord in place. Once I installed the little mount I painted it all and it looked super clean!
*I looked up whether or not your modem and router can be in a box and I read that there is a risk of overheating if the box isn’t ventilated. I plan to make cut outs in the back so there’s a better airflow! But honestly…I’m not taking them out of the box LOL. They don’t feel too hot to the touch, we love how it turned out and the WiFi works perfectly fine throughout the house so I think it’s okay.

I also drilled holes into the desks for the monitor cords to run through rather than sandwiching them in-between the walls.
Making it a priority to think through the details in a big project like this is super important to me. I think the cord situation is not only pleasing to the eye, but it turned out to be a nice added detail as well!