Cheers to the start of Christmas DIY projects! Christmas decor is in full swing over here, I’m so excited!! I shared our staircase garland on IG & wanted to put this super simple DIY up on the blog for you. If you aren’t quite ready to decorate for Christmas no worries, you can pin this DIY & make it later!

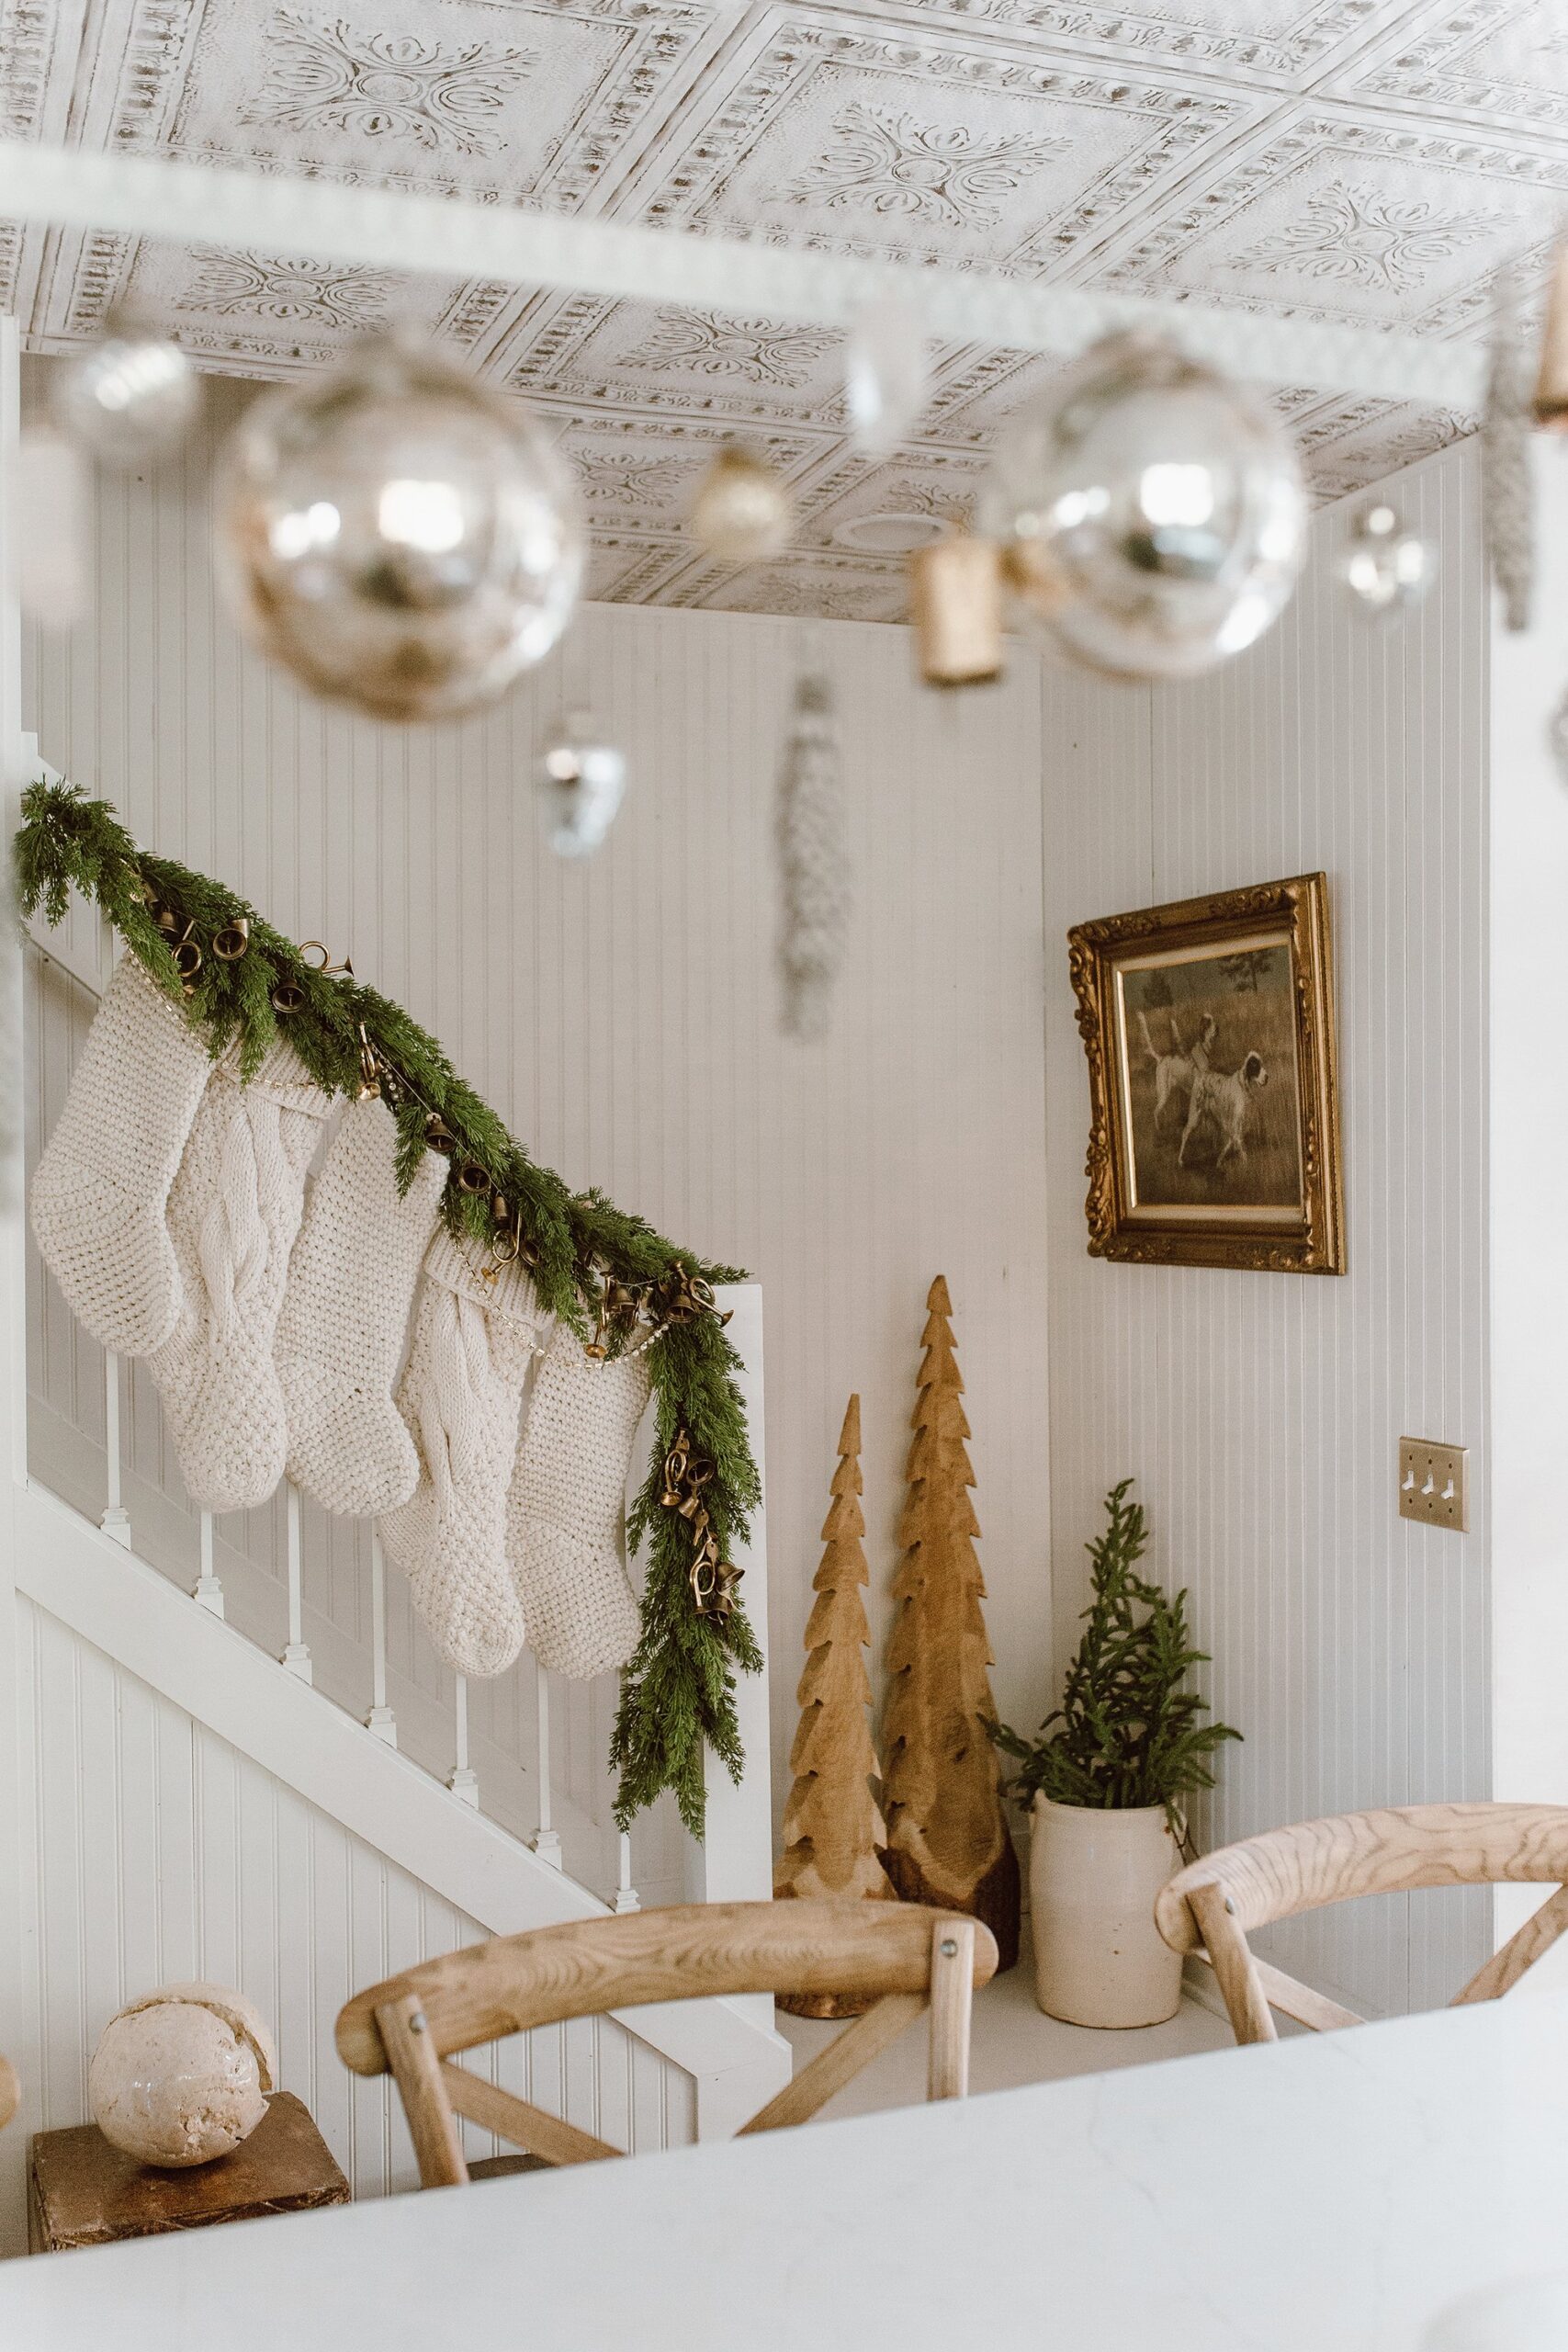
I love using garland in our home for Christmas decor, it’s one of my favorite ways to decorate for the holidays & there are so many places throughout your home you can add garland to! I used this faux cedar garland for the staircase (here’s a dupe option). You’ll want to drape your garland with an “S” shape on top of the rail, no need to wrap around anything, it will just sit on top! My trick for attaching garland to the staircase is to use zip ties, they hold everything in place and are easily concealed in the garland.

Layers! The key to creating the perfect garland is layering. First, start with your base faux cedar garland. Next, add your second layer the rhinestone garland, then add your third layer the DIY bell garland. Finally, hang your stockings on the stair rail. Finish off the staircase area by adding other festive decor items. I put two wooden Christmas trees at the base of the stairs, some faux branches in a vintage crock, and hung beautiful vintage art.


Shop This Look

ACTUAL:
-
Bell Garland – DIY
-
Faux Cedar Garland $149
-
Knit Stockings $50
DUPES:
-
Cedar Garland $68
-
Bell Garland Dupe Ideas:

What You’ll Need
-
Thread
-
Mini Brass French Horns
-
Gold Keys

Directions
-
Pull out a long piece of thread for your garland.
-
String on your mini objects, tying each one so they don’t move around! You can do a pattern or random. I found a bag of the mini brass french horns & a bag of the keys at local antique shops. I found the mini bells here!
-
Tip: Take some creative freedom with the mini objects you add to your garland, you might find other items at your local antique shops that could be perfect on your garland.
-
Once you are happy with the length of your garland, tie off the ends. Attach it to your cedar garland using zip ties!
-
Play around with the placement until you like the way it is layered on top of your garland.
Last year I made a couple of these DIY Jingle Bell Garlands & knew I wanted to use them in my Christmas decor again this year! It is the perfect touch to layer in with your garland and is super simple to make. I’d love to see if you recreate this in your home & your unique spin on the Jingle Bell Garland. Be sure to tag me in any photos you share so I can see your creation! Stay tuned for more Christmas projects coming soon—yay!!!